- Marshalls technique: medium pressure, 30° lance angle, minimum 200mm (8″) standoff — from Marshalls’ own cleaning guidelines
- Turbo / zero-degree / dirt-blaster nozzles: void the technique guidance on every named UK manufacturer’s warranty position
- BS 7533-101:2021 treats jointing sand as load-transfer system — blowing it out compromises pavement structure, not just appearance
- Karcher K7 (consumer flagship): 180 bar (~2,610 PSI) — well above any manufacturer-stated “safe” surface limit if used with the wrong nozzle
- HSE / BS 7976: a pitted or etched surface can fall below PTV 36 (wet slip threshold), turning a cosmetic problem into a foreseeable hazard
The quick answer: yes — but the question itself is usually wrong. Almost every UK guide debates the right PSI number; the manufacturer guidance that actually governs warranty is about technique. Marshalls’ own cleaning & maintenance guidelines[1] specify “no more than medium pressure… with the power-washing lance held at an oblique angle to the paving and at least 200mm (8″) from the surface”. A 3,000 PSI rotary cleaner held at the correct standoff applies less surface force per cm² than a 1,500 PSI consumer machine with a turbo nozzle held 50mm away — and the latter is what voids most manufacturer technique guidance, not the absolute PSI.
This guide gives you the manufacturer-cited technique rules, the PSI table for each surface, the BS 7533-101:2021[2] structural reason re-sanding matters, and the HSE slip-risk threshold[6] that turns a pitted drive from cosmetic eyesore into liability. If you’re weighing it up, the DIY vs professional guide covers the broader cost picture.
Why “what PSI?” is the wrong question
Original analytical contribution: the surface-force a paving block actually experiences is a function of three variables, not one. PSI is the pump rating — it tells you the maximum pressure the machine can deliver at the pump outlet. What governs damage is the surface force per cm² at the point of impact, which is a function of (machine PSI) × (nozzle concentration factor) ÷ (standoff distance squared, roughly). The competitor blogs that all say “2,000–2,500 PSI for block paving” are anchoring to only the first variable.
| Setup | Pump PSI | Nozzle | Standoff | Surface force pattern |
|---|---|---|---|---|
| Consumer machine, “safe” PSI, wrong nozzle | 1,500 | Turbo (rotating pinpoint) | 50mm | Concentrated — etches softer block faces, blasts sand from joints |
| Pro machine, “high” PSI, correct setup | 3,000 | Rotary surface cleaner (enclosed 25° jets) | 200mm (Marshalls minimum)[1] | Distributed — meets Marshalls technique guidance, preserves joint sand |
| Pro machine, “high” PSI, wrong nozzle | 3,000 | Zero-degree pinpoint | 100mm | Catastrophic — cuts skin, lifts blocks, exposes aggregate |
Practical implication: the right safety question is not “what PSI?” but “what nozzle at what standoff?”. Marshalls’ own cleaning & maintenance guidelines[1] answer it directly: medium pressure, 30° oblique lance angle, minimum 200mm from the surface. Tobermore’s installation guidelines[3] echo the same principle for their block paving range. Karcher’s K7 manufacturer datasheet[4] rates the machine at 180 bar (~2,610 PSI) — comfortably above any manufacturer-stated safe surface limit if used with the wrong nozzle.
Manufacturer warranty implications
Many block-paving warranties are conditional on following the manufacturer’s technique guidance. Marshalls’ own cleaning document closes with a notable disclaimer: “Marshalls cannot be responsible for the application and performance of any cleaning product”[1]. In practice this means:
- If you (or a contractor on your behalf) use a turbo nozzle, sub-200mm standoff, or non-medium-pressure setting, you have stepped outside the manufacturer-recommended cleaning envelope. Any claim that a surface defect was caused by a manufacturing fault becomes hard to defend.
- BS 7533-101:2021[2] treats jointing material as part of the structural load-transfer system — not a cosmetic detail. Blowing sand out and not replenishing it can be classed as a structural failure mode, not just an aesthetic one.
- If a pitted or etched surface drops below the HSE/UKSRG PTV ≥36 wet-slip threshold[5], you also potentially face a foreseeable-hazard problem if a visitor slips. The HSE slips guidance[6] is the reference point.
Practical takeaway for Surrey homeowners with relatively new (<10 years) Marshalls, Tobermore, Brett or Bradstone driveways: confirm in writing that any cleaner you hire will follow medium-pressure / 30° / 200mm-standoff technique and document it with a photo or invoice line item. The £5 it costs to ask is the cheapest warranty insurance you can buy.
How pressure washing damages drives
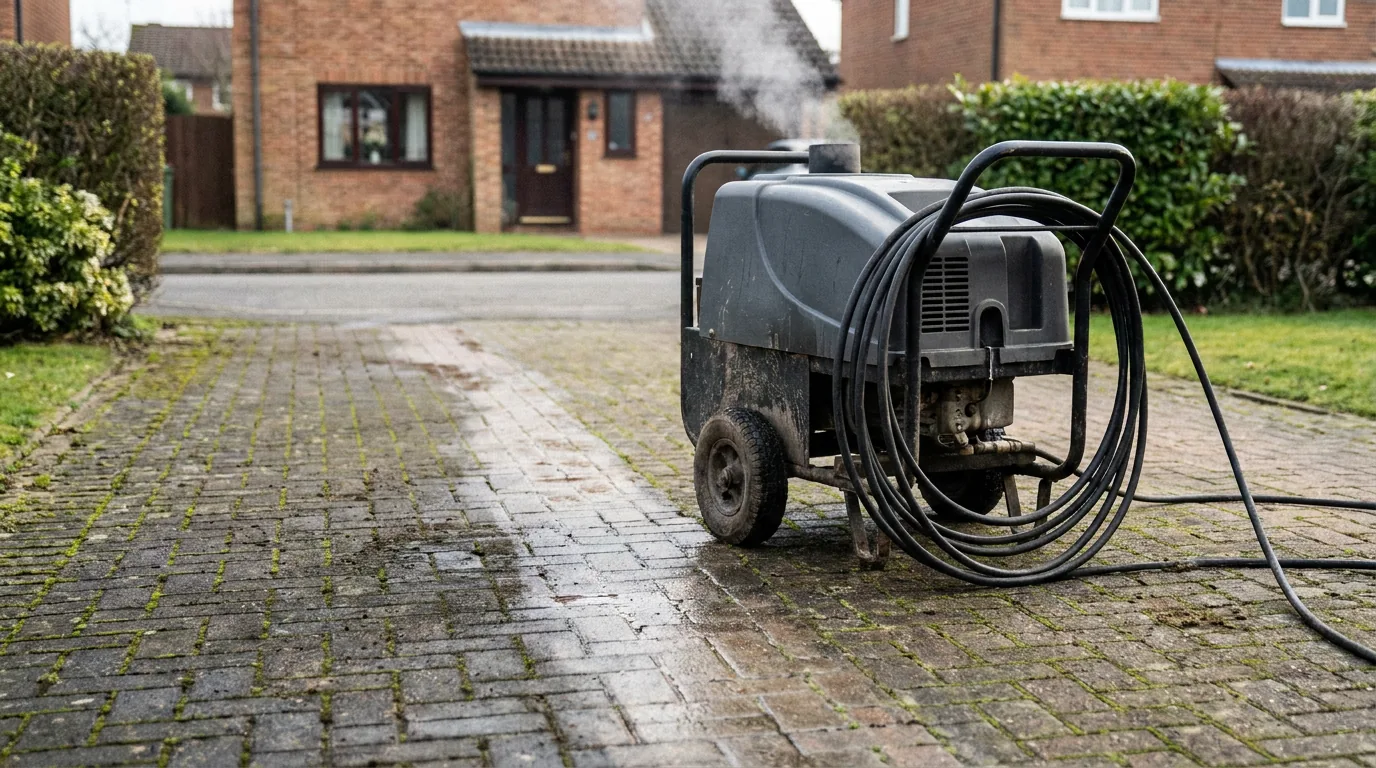
Pressure washers force water at extreme speed against a surface. A typical professional unit operates at 2,000–4,000 PSI — enough to cut skin, more than enough to wreck a driveway if misused. Five things go wrong.
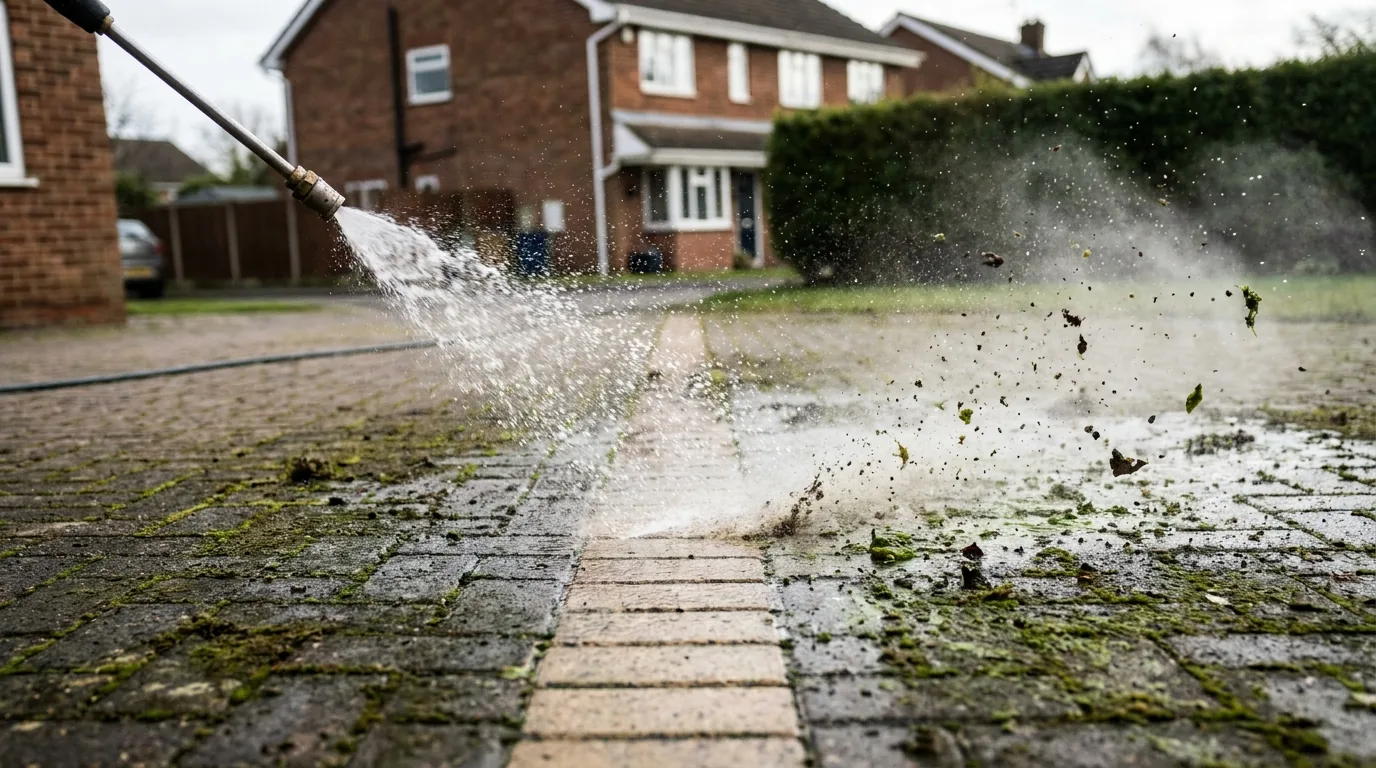
1. Joint sand displacement
The most common form of damage, and exclusive to block paving. Kiln-dried sand between the blocks is what holds everything together. High-pressure water blasts it out, leaving gaps where weeds grow, ants nest, and blocks shift.
Once the sand’s gone, blocks move under vehicle weight, surfaces go uneven, trip hazards form. Most DIY cleaners wonder why weeds come back within weeks — missing joint sand is almost always the answer.
2. Surface etching
Holding the nozzle too close, or using a narrow-angle nozzle (especially the zero-degree pinpoint), concentrates the force into a tiny area. That etches lines and marks into softer surfaces — sandstone, limestone, older concrete.
Etching is permanent. Once the surface layer is stripped, there’s no fixing it short of replacing the affected slabs. The most expensive form of pressure-washing damage.
3. Aggregate exposure
Concrete has a smooth cement layer over the aggregate beneath. Too much pressure or too-close nozzle strips that layer, exposing rough aggregate underneath. The result: an uneven, pitted surface that gets dirtier faster and looks worse than before.
Common on older concrete (20+ years) where the surface has already weakened.
4. Surface stripping on tarmac
Old tarmac becomes brittle and can break apart under high pressure. The bitumen binder weakens with age, especially after 15–20 years. Pressure washing strips loose material and creates potholes.
Worse, once one area goes, water gets in during rain and accelerates the rest. A cleaning job becomes a resurfacing job.
5. Coating & colour stripping
Some drives have coloured coatings, sealants, or surface treatments. High-pressure water strips them away in patches, leaving uneven colour. Common with coloured block paving, pattern-imprinted concrete, and previously sealed resin surfaces.
Safe pressure settings by surface
Using the right pressure for the material is the single biggest thing in preventing damage. Here’s what professionals run.
Concrete (including patterned / imprinted)
- Safe PSI: 2,500–3,500
- Nozzle: 15–25° fan, or rotary surface cleaner
- Distance: 15–20 cm from surface
- Risk level: Low — concrete is robust
The most forgiving surface. Even so, avoid the zero-degree nozzle and don’t dwell on one spot. Pattern-imprinted concrete needs slightly lower pressure (2,000–2,500 PSI) to protect the surface texture.
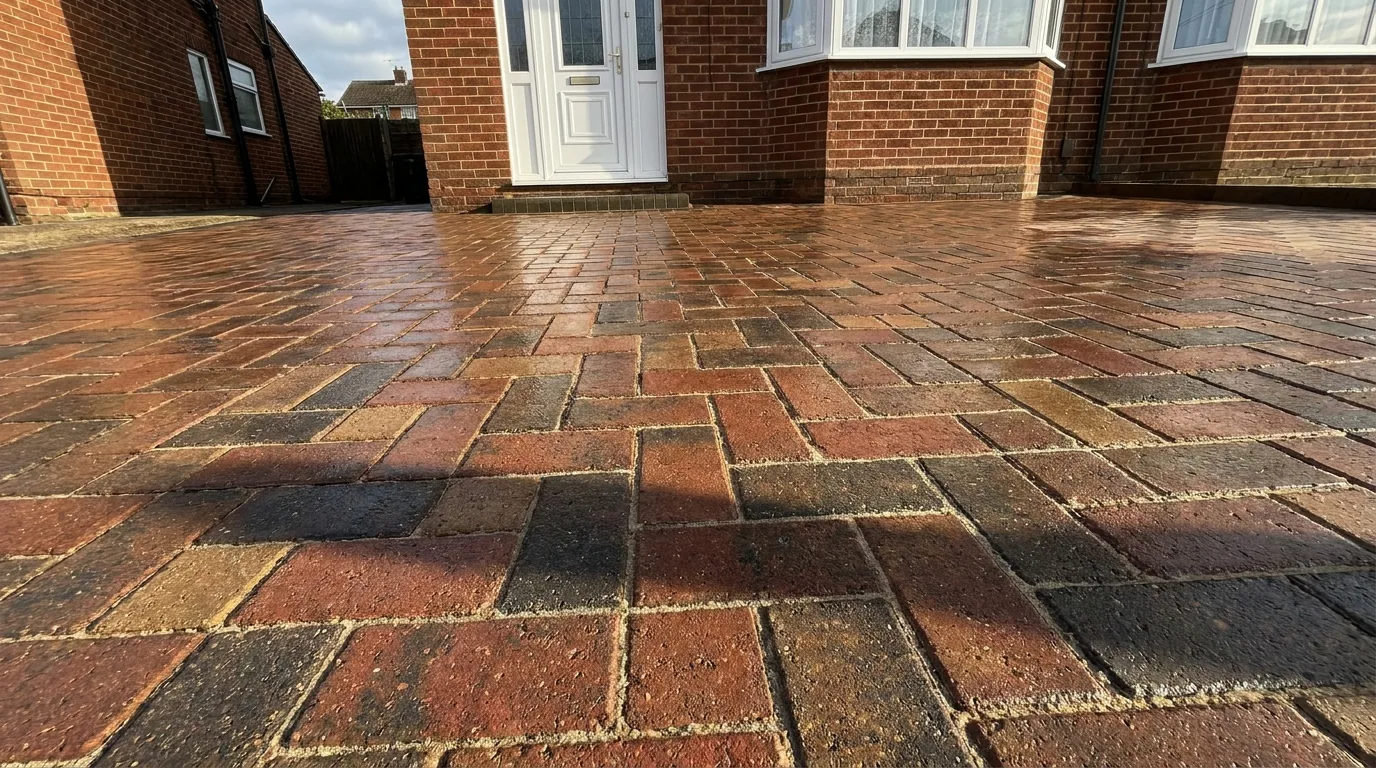
Block paving
- Safe PSI: 2,000–2,500 (machine rating)
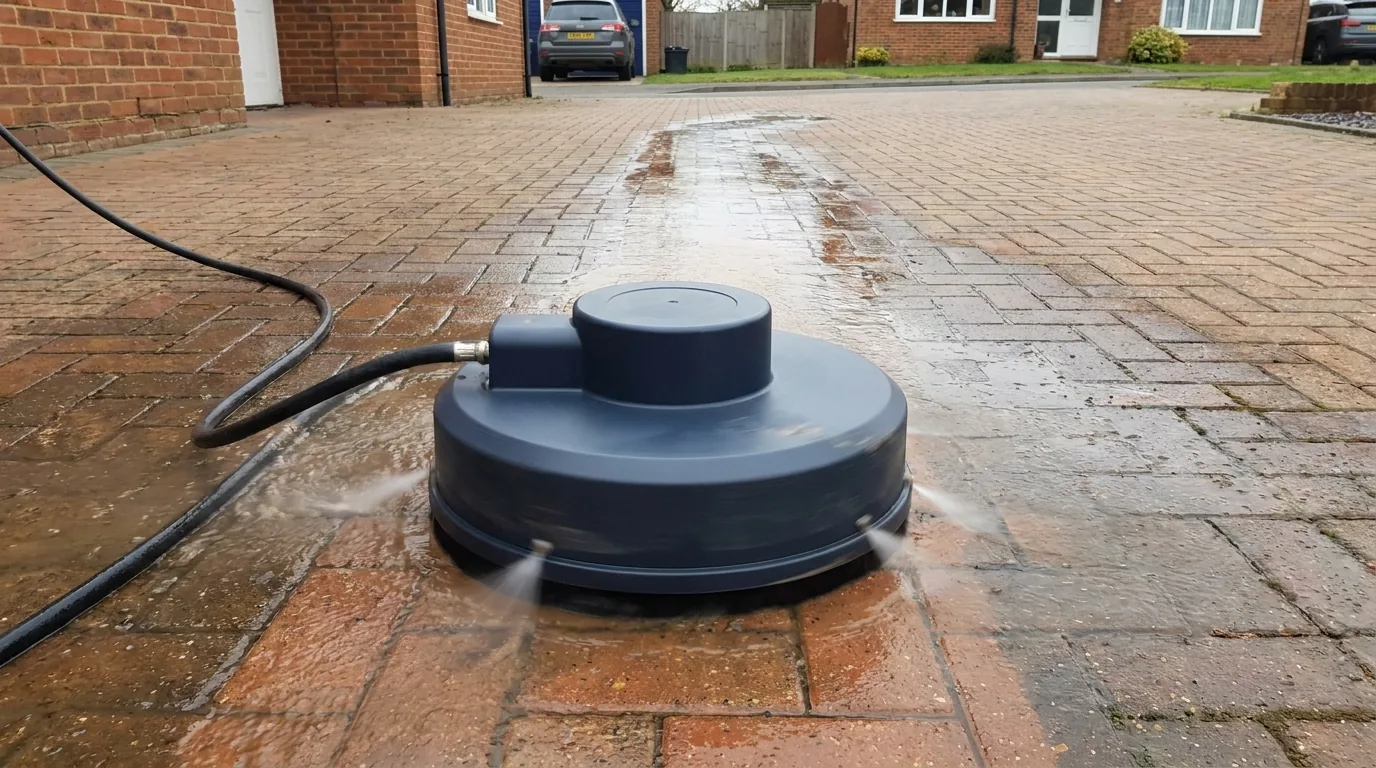
- Nozzle: 25–40° fan, or rotary surface cleaner (Marshalls technique guidance[1]: medium pressure, 30° oblique lance)
- Distance: 200mm minimum (Marshalls cited threshold) — aim for 200–300mm in practice
- Risk level: Medium — sand displacement is the structural issue per BS 7533-101:2021[2], not the blocks themselves
The biggest risk is joint sand loss, not block damage. Use a rotary surface cleaner over a lance — the enclosed design contains the spray and reduces sand blow-out. Always re-sand with kiln-dried sand straight after. Our block paving cleaning service includes professional re-sanding as standard.
Tarmac / asphalt
- Safe PSI: 1,500–2,000
- Nozzle: 25–40° fan
- Distance: 25–35 cm from surface
- Risk level: Medium-High — especially on old tarmac
Newer tarmac (under 10 years) handles moderate pressure fine. Old tarmac is the riskiest surface to clean. Test a small, hidden area first — if it crumbles or stones come away, pressure washing will make it worse.
Natural stone (sandstone, limestone, granite)
- Safe PSI: 1,200–1,800 (sandstone / limestone), 2,000–2,500 (granite)
- Nozzle: 40° fan, or rotary cleaner on low
- Distance: 25–40 cm from surface
- Risk level: High (sandstone / limestone), Low (granite)
Indian sandstone and limestone are the most damage-prone driveway materials. Porous, relatively soft — high pressure etches the surface permanently. Granite is much harder and forgiving but still benefits from moderate settings. For natural stone, chemical pre-treatment does most of the work; the pressure washer just rinses it off.
Resin-bound
- Safe PSI: 1,000–1,500
- Nozzle: 40° fan
- Distance: 30–40 cm from surface
- Risk level: Medium — the resin itself can be stripped
Resin-bound is sensitive to high pressure. The resin coating that binds the aggregate can be stripped, leaving loose stones and rough patches. Lowest effective pressure, wide fan, and if the drive’s over 10 years old, test first.
Safe PSI at a glance
| Surface | Safe PSI | Risk if exceeded | Recommendation |
|---|---|---|---|
| Concrete | 2,500–3,500 | Etching, exposed aggregate | 15–25° fan or rotary |
| Block paving | 2,000–2,500 | Sand blow-out, blocks shifting | Rotary cleaner + re-sand |
| Tarmac / asphalt | 1,500–2,000 | Pitting, loose stones, breakdown | Wide fan, test old tarmac |
| Natural stone | 1,200–2,500 | Permanent etching, pitting | Chemical pre-treat, low PSI |
| Resin-bound | 1,000–1,500 | Resin stripping, loose aggregate | 40° fan, 30–40 cm distance |
Signs of pressure washing damage
After cleaning, check for:
- Visible lines or stripes: nozzle held too close or too narrow an angle. Permanent on stone and concrete.
- Empty joints on block paving: sand blasted out. Re-sand before rain, vehicles, or wind cause more damage.
- Rough, gritty concrete: aggregate exposed where the cement layer’s been stripped. Can’t be repaired — only sealed over or replaced.
- Loose stones on tarmac: binder compromised. More deterioration is coming without repair.
- Patchy colour: sealant or coating partially stripped. Needs re-sealing for a uniform look.
- New water-pooling spots: surface worn unevenly — low points collecting water.
How to prevent pressure washer damage
1. Use a rotary surface cleaner
The single best investment for safe driveway cleaning. Encloses the spray, distributes pressure evenly, prevents striping, and reduces sand displacement on block paving. Professionals use these for every flat surface.
2. Start low, go slow
Begin with the lowest setting and a 40° fan nozzle. If the surface isn’t coming clean, increase pressure gradually. Easier to step up than to repair damage from starting too high.
3. Test an inconspicuous area first
Behind a plant pot, under the car, at the edge — somewhere not immediately visible. Check for damage before committing.
4. Maintain proper distance
15 cm from concrete, 20 cm from block paving, 30 cm from natural stone. Closer isn’t better — it concentrates force into a smaller area.
5. Never use the zero-degree nozzle
The red pinpoint nozzle concentrates the entire force into a pencil-thin stream. Cuts through soft materials, strips paint, etches stone permanently. There’s no safe use for it on driveways.
6. Keep moving
Never hold the nozzle still. Steady, overlapping passes. Dwelling on one spot causes uneven wear and visible lines.
7. Pre-treat with chemicals
Apply biocide 24–48 hours before washing to loosen biological growth. Means lower pressure for the same result — significantly less damage risk. Especially important for natural stone. The driveway prep guide covers pre-treatment in detail.
8. Re-sand block paving immediately
Wait for the surface to dry (24 hours in dry weather), then sweep kiln-dried sand into every joint. Not optional — essential for stability and longevity. A 25 kg bag is £4–£6 from any DIY store and covers ~15–20 m².
When to hire a professional
Some situations are best left to experienced cleaners with commercial kit:
- Indian sandstone or limestone: too easy to damage permanently. Pro expertise essential.
- Old tarmac (15+ years): needs assessment before any cleaning.
- Resin-bound drives: specialist low-pressure techniques required.
- Pattern-imprinted concrete: surface texture damages easily with the wrong technique.
- First time using a pressure washer: learning on your own driveway is an expensive mistake to make.
- Large drives: commercial kit and rotary cleaners are far more efficient on areas over 30 m².
Our professional driveway cleaning carries public liability insurance, which means any accidental damage is covered. Particularly valuable on expensive natural stone or new drives.
What if damage has happened?
Joint sand displacement (block paving)
Fix: kiln-dried sand (£4–£6 per 25 kg bag), swept into all joints. Straightforward DIY repair. Wait for a dry day, pour over, sweep in with a stiff broom. Compact with a vibrating plate if available, or let rain settle it.
Surface etching (natural stone)
Fix: etching is permanent. Severe damage means replacing affected slabs. Minor etching can be partly hidden with a colour-enhancing sealer.
Aggregate exposure (concrete)
Fix: a concrete sealer protects the exposed surface from further deterioration and gives a more uniform look. Severe damage means resurfacing or replacement.
Tarmac surface loss
Fix: small areas can be patched with cold-lay tarmac (DIY stores). Larger areas or multiple patches mean the tarmac is at the end of its life and needs professional resurfacing.
Areas we cover
We work across Surrey within 20 miles of Redhill (RH1) — Redhill, Reigate, Horley, Dorking, Banstead, Oxted, Leatherhead, Epsom, Crawley, and all 15+ areas. Fully insured, free quotes, no obligation. Call 01737 652 515 and we’ll talk through your paving manufacturer’s requirements before quoting.
Sources
Every numeric or technique claim in this guide is sourced. We cite manufacturer technical libraries (Marshalls, Tobermore, Kärcher), BS standards (BS 7533-101 for paving, BS 7976 for slip), and HSE/UKSRG guidance — the bodies whose rules actually govern warranty and liability outcomes on a UK driveway.
- Marshalls plc — Marshalls Garden Paving & Driveways: Cleaning & Maintenance Guidelines (Dec 2017). “No more than medium pressure should be applied when washing paving, with the power-washing lance held at an oblique angle to the paving and at least 200mm (8″) from the surface.” Document also disclaims responsibility for cleaning-product application. marshalls.co.uk — cleaning guidelines (PDF). Accessed 21 May 2026.
- BSI — BS 7533-101:2021 “Pavements constructed with clay, concrete or natural stone paving units — Code of practice for the structural design of pavements using modular paving units.” Treats jointing material as load-transfer system. bsigroup.com — BS 7533-101:2021. Accessed 21 May 2026.
- Tobermore — Installation Guidelines for Block Paving (Professional). Sub-base, bedding, jointing, and ongoing technique guidance from the manufacturer. tobermore.co.uk — installation guidelines (PDF). Accessed 21 May 2026.
- Kärcher — K7 consumer pressure washer manufacturer datasheet. 180 bar (~2,610 PSI), 600 L/hr (~2.65 GPM) — demonstrates that a top-end consumer machine comfortably exceeds any manufacturer-stated safe surface limit if used with the wrong nozzle. kaercher.com — K7 product page. Accessed 21 May 2026.
- UK Slip Resistance Group — “Introduction to the Pendulum Tester (BS 7976: Parts 1-3).” PTV ≥36 low risk, 25–35 moderate, ≤24 high. Pitted/etched surfaces lose PTV quickly. ukslipresistance.org.uk — pendulum tester introduction. Accessed 21 May 2026.
- Health and Safety Executive (HSE) — Slips and trips at work. HSE endorses BS 7976 pendulum testing as the preferred slip-risk assessment method. hse.gov.uk — slips and trips. Accessed 21 May 2026.